Have you ever been able to create a sweater or a knit scarf, but want to add a little more to the look of the garment? It is pretty easy, and adds a lot of definition to the knitted item! Here's how to make this happen:
Note: Working from a knit created row, and are right handed, this will work in any knitted row.
1. Skip the first stitch from the left needle. With your right needle, go behind the left needle, and then push the right needle into the back loop of the second stitch that is already on the left needle. Wrap your yarn around the right needle, knitting, and pull it through.
2. Then, knit the skipped first stitch from the front loop, and then slip both off the left needle.
3. You can then continue with some more stitches, and then continue on to your purl side.
From the Purl side you will want to capture the same area, on the other side, if you are knitting and purling. If you are just knitting, continue the directions above, and add the left cross stitch at the next stitch where you skipped, and slipped. Here's how to perform the Left cross cable in a purl.
From the Purl row, and you are right handed, working in any purl row.
1. Where you want to start your cable, skip the first stitch, and go to the second purl stitch, and purl that stitch, keeping the second stitch on the needle.
2. Purl that last skipped first stitch, and then slip both of your new stitches from the left needle.
Don't worry if this seems confusing, and be gentle and kind to yourself as you are learning. Knitting a new twisty simple twist into any scarf or pattern can vary the pattern a bit, so be careful that you block your items after they are complete. The twist stitch looks so scary, but if you try a stitch, you are going to find the twist very rewarding. If you are making a collar for a sweater, a baby twist in the collar can make it curl in a new an really nice way. Twists are a great way to use a nice yarn that is lofty too, and bring some great simple definition. Cables and twists are often used together, and offer a nice really variable look to the garment.
Here is a very well done video, and this should be a great way for you to knit and purl your way into a happy stitching day!
Sunday, March 18, 2012
Friday, December 30, 2011
Crochet Some Great Gifts!
The finest gift is always your time, and even if you do not have a large family, or group of friends, there are so many people who would really appreciate your gift of a crochet. Think of the many people in nursing homes, who are serving in armed services, or any of the non-profit groups throughout the world. Any item that can be easy to start, can be a great gift. Every crochet starts with a chain, and some yarn, and your hook. It is not a super hard start, which should be very easy for you. Here is a great video that showcases the chain start, see the chain at 1 minute and 17 seconds, and the chain is as easy as this to start...do as many knots as you would like...to create a 60 inch length...the real trick is starting the first row!
So, the infinity scarf is a great gift don't you think? Here are some other simple ideas for gifts with instructional videos to help!
Sunday, November 20, 2011
Amanda's Knitted Baby Blanket
The best present you can give a friend who is expecting is a baby blanket! Especially if the baby is going to be a winter baby, as they will go through blanket after blanket when they are little. Those little hands have a way of spreading the diaper mess everywhere, and when it is cold outside, you can be washing and drying often. There is no better way to spread love and good wishes to your friend or family member than to take time to make a knitted blanket. I know, crochet seems to be the right solution, but when I began this project, I remembered why I love a knitted blanket-the tightness of the stitches keep a warmth and a quality that crochet loses. I promise, you will love the result!
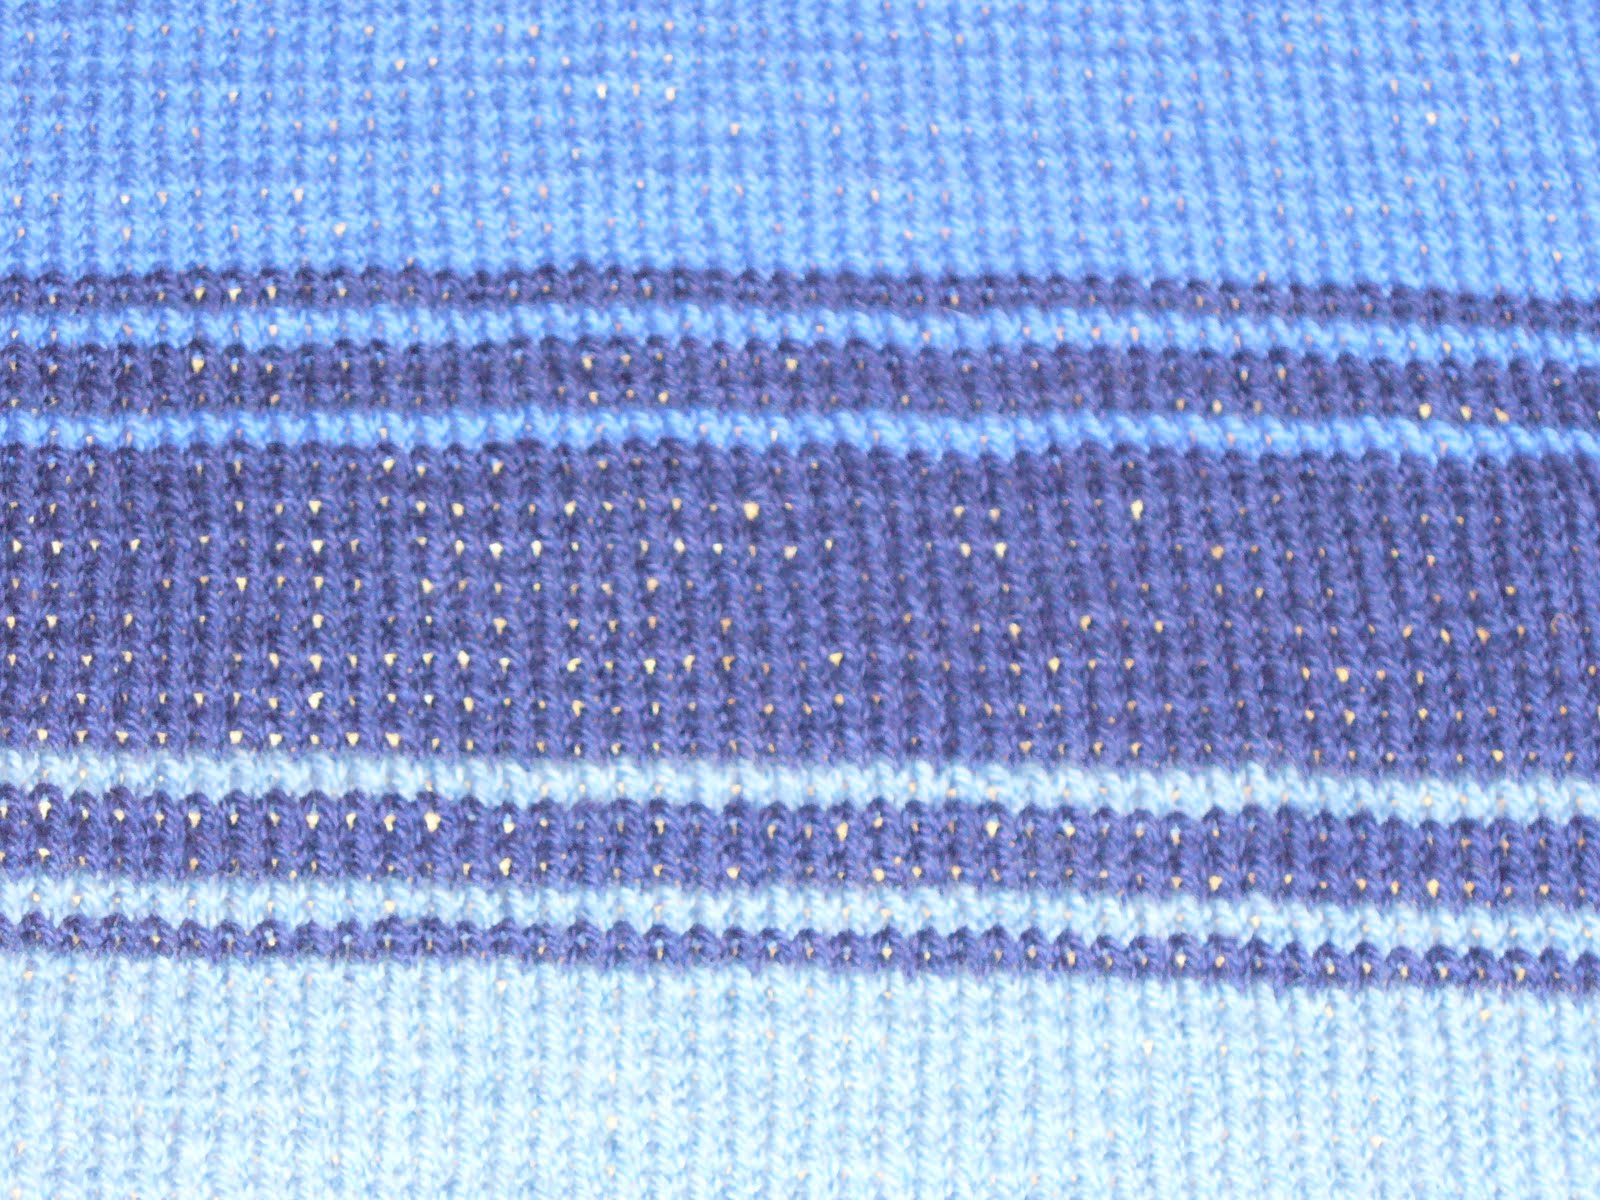
First of all, it is a baby blanket. Amanda and Luke are having a boy! So, here is a really nice blue baby boy blanket that is one row after another. The length is up to you, but I used two skeins of each blue, and added an accent navy blue in the middle to join them together. It was no more than three skeins of yarn, and it cost me no more than $15. What I spent in time, was given back to me in rest and relaxed knitting, which is a gift to any knitter who knows best. The most relaxing and calming activity I have ever come close to knitting, is yoga, but that involves only a brief few hours at best. You can knit all day if you need to find rest and relaxation! Take your mind of politics, off your worries, and any of your daily chores, and find a comfy chair and knit away. I love it so much!
 Here is another shot of the middle, with the stripe change close up:
 So, here are the instructions to make this blanket yourself. You can use any three colors, and if it is a girl, use pink, rose and a dark red. Or, to keep it simple and clean, try three grey tones. Beautiful!
Start with a middle blue, and cast on 72 stitches on a Size 9 needle, 550mm. The yarn I used was the Patons Classic Wool, a Medium 4 Hand wash wool skein, that is easily found in most craft stores. The wool is soft, and comes in many colors. I used royal blue, color 77132, and new denium, color 77115, with an accent of Navy, color 00216. Use up the first color, and when you get to almost the end, start two rows of Accent color, and then two rows of the first color, and then two rows accent, etc, and then four rows accent, and two rows first color, and then 8 rows accent, two row second color, and then 4 accent, and then 2 second color, and then 2 rows accent, and then continue with the new color until the skein is complete.
Now, you can finish by binding off, and then single crochet around the edge, and a little bit of a twist to create the curley edge. The end result is a small, but manageable blanket for mom and dad!
So, here are the instructions to make this blanket yourself. You can use any three colors, and if it is a girl, use pink, rose and a dark red. Or, to keep it simple and clean, try three grey tones. Beautiful!
Start with a middle blue, and cast on 72 stitches on a Size 9 needle, 550mm. The yarn I used was the Patons Classic Wool, a Medium 4 Hand wash wool skein, that is easily found in most craft stores. The wool is soft, and comes in many colors. I used royal blue, color 77132, and new denium, color 77115, with an accent of Navy, color 00216. Use up the first color, and when you get to almost the end, start two rows of Accent color, and then two rows of the first color, and then two rows accent, etc, and then four rows accent, and two rows first color, and then 8 rows accent, two row second color, and then 4 accent, and then 2 second color, and then 2 rows accent, and then continue with the new color until the skein is complete.
Now, you can finish by binding off, and then single crochet around the edge, and a little bit of a twist to create the curley edge. The end result is a small, but manageable blanket for mom and dad!

Sunday, February 20, 2011
Consider a Larger Needle
If you are looking for a fun project, choose a big needle, like a size 35, and some really soft wool, like a mohair or a soft worsted wool. You can make a beautiful scarf, the kind that is sold in fancy boutiques, in virtually no time!
Cast on 12 stitches, and work in a knit only stitch, where you knit each row. No need to purl, so that you get two great sides to this wonderful scarf. This is a called a garter stitch, and it is a great project to start if you are stressed, have just started to knit, or are looking for a way to just create a great gift in no time.
Keep going, until you hit 60 inches. Your mind will be so relaxed when you get to 60. It is like a spa day! Then, when you get there, bind off loosely. Your work will be airy, loose and beautiful. You can make fringe if you want to, by just cutting some same length yarn, and tying to the ends. Use your creativity, and keep knitting!
Sunday, February 13, 2011
How to Double Crochet
Here is a great video that offers the visual help to learning a double crochet stitch. It is abbreviated by dc and is almost the same as single crochet, just doubled. You will love it, as it gives some height to your project. Happy times ahead!
Thursday, January 27, 2011
Finding Great Yarn Can Be Hard!
If you have a great pattern, and you want to make a really nice sweater or blanket for your next project, it can be really hard to find the same dye lot, and the right yarn for your project. Here is a way to do it, with the available yarn that is at the shop!
Hit the sale racks first! Your first stop should be the sale area, as you can often find a clearance on the entire line of yarn in a certain style. It is a great way to find a good start to a project, and get a bunch of colors that are all the same contrasting value of color. For instance, if you are knitting a baby blanket, you want a nice soft wool, and the colors should all be bright and warm, or cool and neutral. Never neutral and bright or cool and warm. The coloration should be mixed to the decor of the home it is going to, so if your project is going to sit in a red room, you do not want to knit cool and neutral. You will go bright and warm!
This is an easy way to think, and if you are finding a great value on natural wool, cotton or silk, buy the entire lot! Do not hesitate, or you will really detest yourself later on. You can always return the yarn if you need to, but often, I find that one lime green ball of yarn, can be worked into my neutral brown pattern, as an accent, and makes a very nice contrast around the neck, wrists, and bottoms of any front or back. Again, this is bright and warm!
Here are some analogies to give you some inspiration on color:
Blue, mint green, lavender and tan, ecru and cremes
Moss green, olives, red, orange, and burgundy
Silver gray, white, brown, tan, and heather pinks
Yellow, blues and reds with a variety of bluish purples and greens
 Do not be afraid to mix colors, and you can find enough yarn to complete any project, and it will be your own!
Hit the sale racks first! Your first stop should be the sale area, as you can often find a clearance on the entire line of yarn in a certain style. It is a great way to find a good start to a project, and get a bunch of colors that are all the same contrasting value of color. For instance, if you are knitting a baby blanket, you want a nice soft wool, and the colors should all be bright and warm, or cool and neutral. Never neutral and bright or cool and warm. The coloration should be mixed to the decor of the home it is going to, so if your project is going to sit in a red room, you do not want to knit cool and neutral. You will go bright and warm!
This is an easy way to think, and if you are finding a great value on natural wool, cotton or silk, buy the entire lot! Do not hesitate, or you will really detest yourself later on. You can always return the yarn if you need to, but often, I find that one lime green ball of yarn, can be worked into my neutral brown pattern, as an accent, and makes a very nice contrast around the neck, wrists, and bottoms of any front or back. Again, this is bright and warm!
Here are some analogies to give you some inspiration on color:
Blue, mint green, lavender and tan, ecru and cremes
Moss green, olives, red, orange, and burgundy
Silver gray, white, brown, tan, and heather pinks
Yellow, blues and reds with a variety of bluish purples and greens

Thursday, January 20, 2011
Crochet a Flat Circle
If you are going to hook a nice series of glass coasters, pot protectors, or round place mats, you can do them in the round! It makes sense when you want to have a place to set your tea pot.
Here's how to start!
Get some great natural cotton fiber yarn, as you can easily wash it, and it will be absorbent for drips and water. You can get some amazing colors, and the price is usually very kind on your wallet. The hook you use, is bigger for a loose, but fast project, like a US K10.5/6.50MM, or a smaller, tighter, but slower and dedicated project, like a US F 5/3.75MM. It is your decision, and often I would start out with the bigger hook, and then try a smaller hook later, after I have worked out the kinks.
Then, make a chain. I would make a chain of 4. Then, take your chain, join the two ends with a sniped piece of yarn, and tie the two ends together, keeping the ball end of the yarn out of the chain. You have made a ring!
Next, look for your stitched ring end, and grab your yarn with your hook, and work into the beginning of the chain, not that nice little bump you made with your chain, but into the center of the ring. You can roll it around, and if you made a chain of 4, you will not have too big a center, but just enough to double your stitches around. Keep working in a single crochet, and add the number of stitches as you go around. It sometimes is helpful to add a twist tie to your "start" as you will do 6 stitches in row 2, (not including your first single crochet to get you started), 12 in row 3, and 18 in row 4, etc... You are adding 6 on each turn. Always, when you reach the end of the row, join the row you created with the start.
Here is some great yarn to get you going!
Tuesday, January 18, 2011
Can you slipknot?
I love a good slipknot, and if you are not used to doing it, here are some great starter tips! You need to have some patience-deep sigh!-and some yarn, and two needles. Two needles will be needed to get you knitting, but we are only going to use one for your slip knot.
So, you have the ball of yarn, the end, and your hands. Yes, I know this is very simply stated, but I want to keep this as simple as I can. Take the ball of yarn, and pull it on your right side. Then, pull out maybe two feet of yarn, more if you are making a blanket. You will see why later...
Take the end, and closer to the yarn ball, wrap around your left index finger and your middle finger. Do this from back to front, looking at it. Then, do it again. Take your ball yarn, and then bring it through the hole. Drop your left hand fingers, and pull on your loop. Yippee! A fine slipknot you have made!
The best part is now to come! Take your knot, and push your needle through it, and do it from the front to the back, with the point further from you. This way, you have the ball of yarn behind your right hand, and the end to your left. The knot sits under your needle, and the knot is your first stitch in your work.
Here is a nice video to show you how it looks in action. Let me know if you have any questions! Cheers!
Saturday, January 15, 2011
How do you count rows?
Here are some ways to count rows when you are knitting or crocheting your next pattern! Be sure to not lose your mind-or your eyesight with crazy row counting during your fun.
1. Use a row counter at the end of each row. These little counters can be used on one or both needles in knitting, and near you specifically in a crochet pattern. If you use a counter in knitting or crochet, be sure to count two, and then turn the counter. This is because the odd numbers are on one needle, and the other is the even rows. Example: 1,3,5 on odd; 2,4,6 on even.
2. Make a copy of your pattern, my favorite method! Then when you complete your steps, just cross them off. If you want to refer back to your pattern use a highlighter and you will know where you are.
3. Use stitch counter rings, paper clips or other metal twisty ties! Then, when you get to the end of the body area, you can know where the start and stop is. This can be really helpful when you are creating some complex patterns that have to join together.
Thursday, January 13, 2011
Binding off Your Knitting
If you are knitting a row, and it is the last row, Yippee! Great job, wow, look at you go, what a great knitter you are! Then, you want to bind off in a knit row.
The fact that all good things have to end, can be very happy! I am always happiest when my work is turning out to be a masterpiece, and I am really ready to bind off. At the same time, it kind of is a tricky emotion too, as you are now done, and well, it was so much fun when you are in it. Eat your cake and have it too kind of thing...
So, what if your last row is a purl row? What do you do? Purl and bind off sugar! Do not knit that last row in a bind off, unless the pattern calls for it. It will look funny. Great video for you! Have fun at your knitting.
Tuesday, January 11, 2011
Knitting with Circular Needles
Whoo, scary idea huh? Actually, it is not as bad as you think it might be! There are some things you are going to need to learn, and one is the mental hurdle of getting past the straight row. This is going to be fun, trust me!
When you are knitting a cap or a sock, a neck band on a sweater, use a circular set of needles. The great thing is you can really whip this thing together, as it is kind of like a crochet in a knit. When you do not have to turn the darn thing all the time, you feel like you can just keep going.
This presents another problem, as you need to watch how many rows you are going on, and if it is joined to a sweater body, that is fairly easy. But, if you are working on a sock or a hat, well, you need to either count your rows once and awhile, or stick in a tag at row 10, or 15. That way you can have some organization to this loose way of knitting. By the way, if you like it, you will love crochet!
So, here we go!
Lets do a hat, and you need to follow your pattern, and buy a set of circular needles that will create the right size of circle. The 8 needles will make a 8 sized knot, and a 22 need will create a 22 sized knot. Your sizing is coming into how many stitches you cast on. So, you can make socks with a 22 needle, but wouldn't it be nicer with tight little knots?
Be sure to use the size needle that your pattern calls for. So, cast on your amount of stitches, just like you would on straight needles. Then, go back to your first cast on, at the end of the left needle. Make sure the bumps or knit heads are pointed down when you do this. Then, start your knit process. When you get to the end of the row, you can then knit away, continuing round and round until you have the circle going in the right direction. Your pattern will tell you when to increase, and when to decrease.
Play with this, and enjoy your round about!
Sunday, January 9, 2011
Abbreviations for Knitting
Here is a handy list for you to use for your knitting patterns. The knitters of the world hate to spell anything out, but I promise to never abbreviate speak, first, and explain it to you in every pattern I create for you, before using this list. It just is not fair to new knitters!
Source: Yarn Standards
Source: Yarn Standards
| alt | alternate | psso | pass slipped stitch over |
| beg | begin/beginning | pwise | purlwise |
| bet | between | rem | remain/remaining |
| BO | bind off | rep | repeat(s) |
| CA | color A | rev St st | reverse stockinette stitch |
| CB | color B | RH | right hand |
| CC | contrasting color | rnd(s) | round(s) |
| cm | centimeters | sk | skip |
| cn | cable needle | skp | slip, knit, pass slipped stitch over |
| CO | cast on | sk2p | slip one stitch, knit two together, pass slipped stitch over |
| cont | continue | sl | slip |
| dec | decrease/decreases/decreasing | sl1k | slip one knitwise |
| dpn | double-pointed needle(s) | sl1p | slip one purlwise |
| fl | front loop(s) | sl st | slip stitch(es) |
| foll | follows/following | ss | slip stitch (in Canadian patterns) |
| g | gram | ssk | slip, slip, knit those two stitches together |
| inc | increase | sssk | slip, slip, slip, knit three slipped stitches together |
| K | knit | st(s) | stitch(es) |
| k2tog | knit two together | St st | stockinette stitch |
| kwise | knitwise | tbl | through back loop |
| LH | left hand | tog | together |
| lp(s) | loop(s) | WS | wrong side |
| m | meters | wyib | with yarn in back |
| M1 | make one stitch | wyif | with yarn in front |
| M1 p-st | make one purl stitch | yds | yards |
| MC | main color | yfwd | yarn forward (yarn over) |
| mm | millimeters | yo | yarn over |
| oz | ounce | yrn | yarn around needle (yarn over) |
| P (or p) | purl | yon | yarn over needle (yarn over) |
| pat(s) or patt | pattern(s) | yo | yarn over |
| pm | place marker | [ ] | work instructions in brackets as many times as directed |
| pop | popcorn bobble | ( ) | work instructions in parenthesis as directed (also used to indicate size changes) |
| p2tog | purl two together | ** | repeat instructions after asterisks as directed |
| prev | previous | * | repeat pattern following asterisk as directed |
Saturday, January 8, 2011
Crochet is So Much Fun!
Here is a great video showing some fun little animals you can make in a day. It is a great way to connect with your kids, a neighbor, or just a way to make some fun gifts for any occasion. The animals are your invention, so keep in mind you are just chaining, and it is so easy, any level of crochet expert can do it!
Friday, January 7, 2011
Making a Buttonhole
If you are knitting, you can easily make a buttonhole, by deciding where in your body of your work it needs to be, and then simply bind off(BO). The transition back is as simple as the binding off, and then beginning to knit again, when you end the row.
Simply turn the row around, and then continue knitting or purling, whichever your pattern calls for, and then when you get to the bound off section, where your button hole is, become a button hole expert, and try the following trick:
Switch your needles from left to right hand, and vice versa. Then, cast on the same amount of stitches, and be sure to bring your yarn forward, upon your last cast on(CO) stitch, to transfer back your needles right to left, and left to right. Continue your purl or knit, and you have the best darn buttonhole.
Monday, January 3, 2011
Creating a Knitted Kitty Sweater

Measure your pet, (1)around the neck, (2)from neck measurement-to front legs, (3) around the belly, (4)from neck to belly, and (5)down the back from head to tail. Start with a cotton or wool, and never use acrylic, as some animals can be allergic. I always use the economical Paton Classic Wool Yarn, so if you are looking for a match to Sheeba's sweater, I believe the color is called Rosewood! I only used less than one ball of yarn for this project. You can join together colors, and use up some of your stored yarn, be creative!
Start with a US needle 11, and cast on enough to match your neck measurement. You are going to create a big rectangle, and then drop some stitches, and add some to fashion your sweater. It is really easy, so do not worry too much. Continue with your knitting by turning and knitting one row, and then one row purl. Continue k,p until you have enough knit rows, and enough purl rows to reach the legs. You can really see how this is going to work now!
Now, you are going to skip some stitches to create a button hole for the legs. The seam for the sweater is on the underneath or belly of your pet, so the leg openings will be on the edges of the rectangular piece.
SEE NOTE BELOW ****When you are ready to knit, and you have reached the measurement where the openings will be, Go in 5 stitches, and then bind off 10 stitches. Continue to the end of the row, and be sure to watch, that you bind off 10 when you get to 15 from the end, and then knit 5 more. Turn, and Purl 5, bind off 10, and continue to the last 15 stitches, 10 BO, and then P 5. SEE NOTE BELOW***
Continue on, completing two rows K and P to even it off! Now, you are going to increase or decrease towards your belly measurement(3). You should now refer to measurement (4) and see where you are from your leg openings. Compare your Belly Measurement(3), and see how much your increase or decrease is. Some animals have a decrease, like a bull dog or a doberman. You should add 2 K and 2 P until you get to the belly measurement, and do it so that it is fashioned at the right point. Do not worry if measurements (3) and (4) do not meet perfectly, as it is a stretchy garment.
Now, measure your fashioned piece, and see how much more you need to stitch. If you are knitting for a boy dog, you might want to stop shorter, to allow some freedom for bathroom breaks.
BO when you reach the end of your measurement length (5), and if it is still too long, you can roll it over, and stitch to make it work. You should then stitch it closed at the ends, near the leg openings, and then roll it over your pet's head, and pull out their little legs.
***NOTE: Before performing the leg opening step, check your pet! If you find the legs are too close together, using the example of knitting 5, then BO 10, then continuing, you can rework your work, and move then further into your square. Meaning, instead of 15 st into the work, try 20, or 26. It is going to be a custom piece for your pet, so try to imagine how much space you will need for their legs to move and be comfortable.
The best way to keep this clean is to just brush it off, and if you find it is really dirty, a hand washing may be in order!
Wednesday, December 29, 2010
Kniting during the Holidays
If you are like me, you have knitted your way through the holidays, gifts, and enjoyed yourself very much! Do not get burned out, but take some time to think about your self now. In January, I find it is the best time to work on your own sweater, cape or skirt. It is me time now, and what better way, than to find a great wool, and make some short work of it!
Find some great patterns, and buy a new book. There is nothing like having a new knitting book, and sitting in your lazy knitting chair, with some tea, and working through your next dream. Find your pattern, and decide. Wow, isn't that hard?
So many patterns, so little time! Make a decision, and then make a second decision, just in case your wool or silk or cotton is not available. You can find great wool online, but it is fun to really see and feel the wool. Keep your plan, bring the book, and get help at the store on how much wool to buy. Be sure to buy two extra balls, as you can not come back and expect the same dye lot, but you can always return the extra.
Now, take your time with the pattern, and learn some new steps if you can. It is for you after all!
Thursday, December 2, 2010
Holiday Gifts are Best when Handmade
Making holiday gifts is always best when you can do it by hand! You can make something that everyone will love, and here are some great ideas!
If you are crocheting, use cotton yarn and make:
1. Washcloths
2. Eyeglass cleaning tool
3. Eyeglass case
4. A cute fun long crochet tassle to hold curtains back, or a long belt!
If you are knitting, use wool, and make:
1. Mobile Phone Protection Case
2. A Long thin scarf for your niece in a bright color
3. A pair of mittens lined in polar fleece
4. A brightly colored square hot plate trivit.
Do not let time stop you, you can always start with one gift and see how quickly you can complete it. The time you spend thinking of your gift receiver, while you make the gift is a great way to send your love.
Tuesday, November 16, 2010
Moose Valley Winery: Our Journey in Home Winemaking: Beaujolais Nouveau
Moose Valley Winery: Our Journey in Home Winemaking: Beaujolais Nouveau: "I had no idea what this was until a few years ago when my aunt brought a bottle of this to Thanksgiving Dinner. It was a tradition for her ..."
How do you create a new row of color?
If you are knitting or you are busy with your crochet, you are going to want to end one color and join in another! This is scary for a new knitter, or happy crochet queen, because you are actually going to have to cut that beautiful wool yarn...it always makes me cringe.
The thing you need to do, is end a color at the count of the row, or at the end of the row. Then, just bring into your work the new color. Keep the old color long and still tied to your yarn ball, and just work in your new color with a new stitch or a a new hook. It is that easy!
Once you have the yarn new color worked in, and you like what you see, you can clip that old color. Or, bring the old color up and create a series of stripes. It is nice to have the variance, and this is great practice. If you are worried about the end, tie a snug knot, and then at the end of your knitting or hooking performance, bring it up and work it again.
Do not worry too much about your finishing until you get there. The real test of any crafting project is to try new and different things, find a challenge, and give it go!
Stripes are great fun! Enjoy yourself!
Saturday, November 6, 2010
My Nephew's Crochet Blanket
Then, in the middle I did do something fun and very open, and used a shell hook pattern. This is a really easy stitch which you use a second crochet stitch, and just keep going to the same spot to start say 5 stitches. It makes a pretty fan!

Subscribe to:
Comments (Atom)